
Quick answer: A small chip in porcelain or enamel can often be filled with a compatible repair compound in a short work session, but curing takes longer and a close color match may require professional patching. DIY kits from hardware stores run about $10 to $35, while professional small-chip repairs typically cost $195 to $300 according to Angi.
Key takeaways
- A quarter-size or smaller surface chip is usually the limit for a safe DIY fix; anything bigger or deeper often needs professional patching.
- DIY porcelain chip repair kits typically cost $10 to $35, while professional small-chip repairs run about $195 to $300, according to Angi.
- Color matching is the hardest part of a chip repair because factory white, bone, and almond shades vary slightly between manufacturers and even between years.
- A patched chip that isn’t sealed properly will stain and discolor from hard water and humidity faster than the surrounding enamel.
- If rust, exposed metal, or spider cracking surrounds the chip, the damage should be assessed by a professional repair specialist first.
What Counts as a Small Chip vs. a Repair Job for a Pro
Not every ding in a tub, sink, or tile needs a professional visit. For this guide, a small DIY candidate is a shallow chip smaller than a quarter, without a spreading crack, extensive rust, or flexing around the damage. These are common around faucet handles, drain edges, and anywhere a razor, shampoo bottle, or dropped tool has struck the surface.
According to This Old House, the key factors in deciding whether to DIY are depth, location, and size, with most do-it-yourselfers able to handle chips smaller than a quarter that are not near a drain or in a high-stress area. If the chip exposes the substrate, has sharp or unstable edges, or shows spreading rust or cracking, ask a professional whether spot repair or bathtub restoration is appropriate.
This damage can occur in older homes and frequently used rentals, especially when impact damage is followed by prolonged moisture or mineral buildup.
Materials You Need for a DIY Porcelain or Enamel Chip Repair
Before buying anything, confirm what your surface is actually made of. Porcelain-enameled steel and cast iron tubs generally attract a magnet, while acrylic or fiberglass tubs do not; tapping can offer another clue, as noted by Angi. A repair kit that is incompatible with the surface can bond poorly or discolor.
- Two-part epoxy or porcelain touch-up kit rated for tubs and sinks, matched to your exact color (white is not one shade; bone, almond, and off-white all vary)
- Degreaser and a sponge to strip soap film and body oils from the chip and surrounding area
- Lint-free cloth for drying the area completely before any product touches it
- Painter’s tape to mask off the repair zone and keep edges clean
- Fine sandpaper, around 400 to 600 grit for leveling, then up to 2,000 grit for the final smoothing pass
- Small artist’s brush or flat plastic putty knife for applying the filler
- Chemical-resistant gloves, eye protection, and ventilation as directed by the product label and safety data sheet
Hardware store kits generally run about $10 to $35, which is a reasonable first attempt on a visible but minor chip, according to Angi’s cost research on bathtub repairs.
Step-by-Step: How to Patch a Small Chip
- Clean thoroughly. Clean the chip and the surrounding area with a surface-compatible cleaner to remove soap scum, oils, and loose debris, then rinse if directed and dry completely.
- Rough up the edges. Prepare the chip only as the repair-kit instructions direct, removing loose material and sanding only the specified area with the recommended grit. Wipe away the dust with a dry cloth.
- Mask the area. Apply painter’s tape around the chip to keep excess product off the surrounding glaze.
- Mix the filler. Follow the kit instructions exactly on ratio and working time; two-part epoxies set fast once combined.
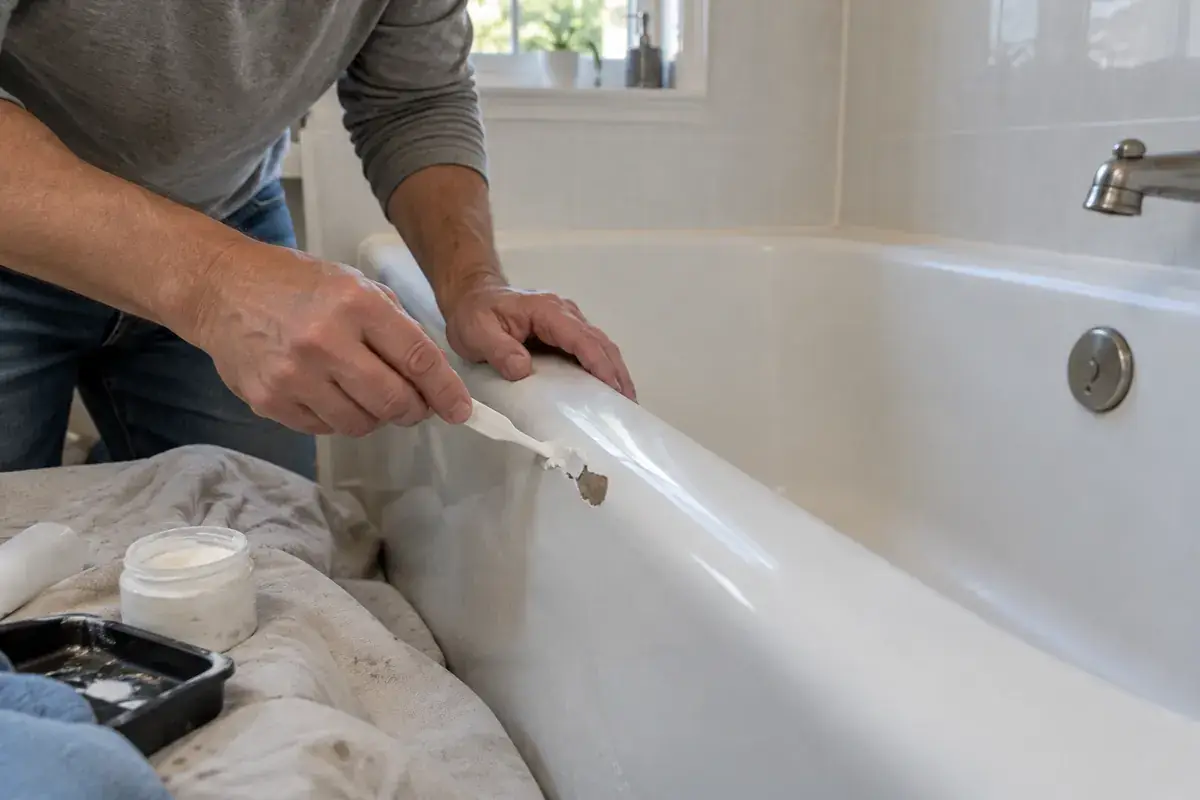
- Apply in thin layers. Use the brush or putty knife to build the filler slightly above the surrounding surface, letting each layer dry before adding the next.
- Cure fully. Allow the compound to cure for the full time stated by the manufacturer before sanding or applying another layer.
- Wet-sand and polish. Once cured, sand or polish the patch only if the kit instructions permit it, using the specified grit and method to bring the repair flush with the surface.
- Let it set before use. Avoid water contact for the full cure time specified by the manufacturer.
Take your time between steps. A patch applied over residue, moisture, or uncured layers may bond poorly or leave a visible defect.
What Results to Realistically Expect
A well-executed DIY patch on a small, shallow chip can look nearly invisible up close for a while, but it is a cosmetic fix, not a refinish. Expect some of these realities:
- Color match will likely be close but not exact, especially on older fixtures where the factory glaze has yellowed slightly over the years.
- The patched spot may be less durable than the surrounding factory finish, particularly in frequently used tubs and sinks.
- Patches do not blend into the overall sheen the way a full reglaze does, because spot repairs can’t replicate the uniform spray-on coating of a professional refinish.
- If the chip is on a sloped or high-contact surface like a tub floor or sink basin, water pooling will test the patch’s adhesion faster than on a vertical wall.
For a single small chip on an otherwise sound surface, this trade-off is often worth it. If the same tub has multiple chips or widespread finish wear, compare professional spot repair with full refinishing before proceeding.
DIY Cost vs. Professional Chip Repair Cost
Cost is one of the biggest factors in deciding whether to DIY. Here is how the options generally compare, based on national cost data from Angi and This Old House. Actual costs vary by tub material, chip size, color complexity, and local labor rates, so treat these as typical ranges rather than quotes.
| Option | Typical Cost Range | Best For |
|---|---|---|
| DIY chip repair kit | $10 to $35 | A single small, shallow chip in a common color like white |
| Professional spot chip repair | $195 to $300 | Chips in a visible spot, custom colors, or when DIY color match failed |
| Full professional refinishing | $330 to $630 per Angi; roughly $250 to $650 total by material, per This Old House | Multiple chips, dull or stained glaze, or surfaces beyond spot repair |
Full replacement of a tub typically runs much higher, from roughly $1,900 to $9,160 according to Angi, which is one reason resurfacing remains the more budget-friendly route for most homeowners and landlords.
When to Call a Professional Instead
Some situations are outside the scope of a home repair kit, no matter how carefully it’s applied. Call a professional if:
- The chip exposes bare metal, fiberglass, or shows active rust underneath
- There are multiple chips, cracks, or spidering across the surface
- The color is custom, discontinued, or hard to match from a retail kit
- The chip is in a high-wear zone like a drain edge, faucet base, or tub floor where patches fail fastest
- You’ve already tried a DIY patch and it’s peeling, yellowing, or staining
Jemco Reglazers has been handling chip and crack repair, along with full bathtub resurfacing in New Jersey, for over 15 years as a family-owned business based in Toms River. We also handle tile reglazing in NJ for chipped or cracked tile that shows the same wear patterns as tubs and sinks. Most professional resurfacing projects are completed in just a few hours, with the surface ready to use within 24 hours, which makes it a practical option for rental units and shore homes that can’t sit out of commission for long.
Chip Repair vs. Full Resurfacing: Which Makes More Sense
A single small chip rarely justifies a full refinish. But chips are often a sign of a glaze that’s aging across the whole surface, not just at one point of impact. If you’re weighing the two, consider:
- One isolated chip, good overall glaze: spot repair, DIY or professional, is the more economical choice
- Several chips plus dullness, staining, or hairline cracking: resurfacing addresses all of it at once and tends to last longer than patching each spot separately
- Chips on a tub you’re already unhappy with the color or finish of: this is a good time to consider a full refinish rather than patching a surface you plan to replace later
Resurfacing can save up to 70% compared to full fixture replacement, which is worth factoring in before committing to a full tub or sink swap over a patch-prone surface. You can view completed projects in our gallery of reglazing work.
Local Factors That Affect Chip Repairs in New Jersey Homes
New Jersey’s climate and housing stock both play a role in how well a chip repair holds up. Frequent moisture at a damaged or poorly sealed edge can undermine a patch, while mineral-rich water can leave deposits or discoloration over time.
Older cast iron or steel tubs may be harder to color-match because age, wear, and previous cleaning can change the appearance of the original finish. In these cases, a professional with color-matching experience usually gets closer results than a retail kit’s limited shade options.
New Jersey’s Uniform Construction Code distinguishes repair work from alterations involving plumbing or structural components; a homeowner planning fixture removal, plumbing changes, or structural work should check current Department of Community Affairs requirements and consult the local code official. If you’re ever unsure whether a repair crosses that line, it’s worth checking before starting work.
Frequently Asked Questions
Can you repair a chip in porcelain without replacing the whole tub?
Yes, many small, isolated chips can be patched without replacing the tub. A two-part epoxy filler sanded and polished to match the surrounding glaze handles most isolated chips. Replacement is usually only needed when there’s structural damage, extensive rust, or cracking throughout the base material.
How long does a patched chip last before it needs redoing?
A patch’s lifespan depends on surface preparation, product compatibility, cure time, chip location, and frequency of use; professional repair may provide a more durable result in difficult areas. High-contact spots like drain edges or tub floors wear faster than vertical walls or backsplashes.
Will a chip repair kit match my tub’s exact color?
It gets close but rarely matches perfectly, especially on older fixtures where the factory glaze has yellowed over time. Professional refinishers can custom-mix colors more precisely, which is why color-critical repairs on visible chips often go better with a pro than a retail kit.
Is it safe to do a porcelain chip repair myself?
Small, shallow chips may be suitable for DIY repair if you follow the product label and safety data sheet, use the specified protective equipment and ventilation, and observe all preparation and cure instructions. Epoxy fumes can be strong, so avoid rushing the process or skipping ventilation, and call a professional if the chip exposes metal or shows rust.
What’s the difference between chip repair and reglazing?
Chip repair fills and smooths a single damaged spot, while reglazing applies a new coating across the entire tub, sink, or tile surface. Reglazing addresses overall dullness, staining, and multiple imperfections at once and typically produces a more uniform, longer-lasting finish than spot patching alone.
Sources
- How to Fix a Chipped Bathtub | Angi
- How To Fix a Chipped Bathtub: A Step-by-Step Guide – This Old House
- How Much Does Bathtub Refinishing Cost? – This Old House
- How Much Does It Cost to Refinish a Bathtub? – HomeAdvisor
- New Jersey Department of Community Affairs | Current Construction Codes
Written by the team at Jemco Reglazers, a family-owned New Jersey bathtub and tile reglazing company with over 15 years of hands-on experience restoring bathroom surfaces.