
Quick answer: A tiled shower relies on a continuous waterproofing system behind or directly beneath the tile, with properly sealed movement joints and penetrations helping direct water toward the drain. Leaks commonly develop at failed movement joints, penetrations, drains, shower-door interfaces, plumbing connections, or defects in the pan and waterproofing system. Regular sealing, prompt caulk repair, and catching small cracks early prevent the costly hidden water damage common in older NJ homes.
Key takeaways
- Common shower leak paths include failed movement joints, penetrations, drains, door interfaces, plumbing connections, and defects in the pan or waterproofing system.
- A properly installed waterproofing membrane sits behind the tile, so tile itself is never the sole barrier against water intrusion.
- Frequent moisture exposure and mineral buildup can make shower joints harder to maintain and may obscure early signs of deterioration.
- Catching a hairline crack or soft spot early can mean a localized repair instead of tearing out an entire wall of tile.
- New Jersey does not generally permit field-fabricated fiberglass shower pans, so pan-level work should be reviewed for compliance with current state and local requirements.
Why Does Shower Tile Leak in the First Place?
A tiled shower surface is not, by itself, a complete waterproofing system. It is a hard, decorative surface that sits on top of a waterproofing system, and that system is what actually keeps water out of your walls and subfloor. When a tiled shower leaks, the source may be a failed joint, penetration, drain, plumbing connection, pan, or waterproofing layer.
According to a Building America measure guideline published by the U.S. Department of Energy, a persistent myth in residential construction is that the finish surround on a tub or shower is 100% waterproof on its own. In reality, the many transitions between backerboard, tile, and fixtures are the weak points where water gets past the surface and into the wall assembly over time.
In any frequently used shower, mineral buildup and worn joints can hide early signs of deterioration. Routine inspection and maintenance help, but they cannot compensate for a defective pan or waterproofing system.
Common Failure Points in a Tiled Shower
Knowing where showers typically fail helps you catch problems before they spread behind the wall. These are common places to check when investigating a tiled-shower leak.
- Grout lines: Cracked or deteriorated cementitious grout can admit more moisture, but grout is not the shower’s primary waterproofing barrier.
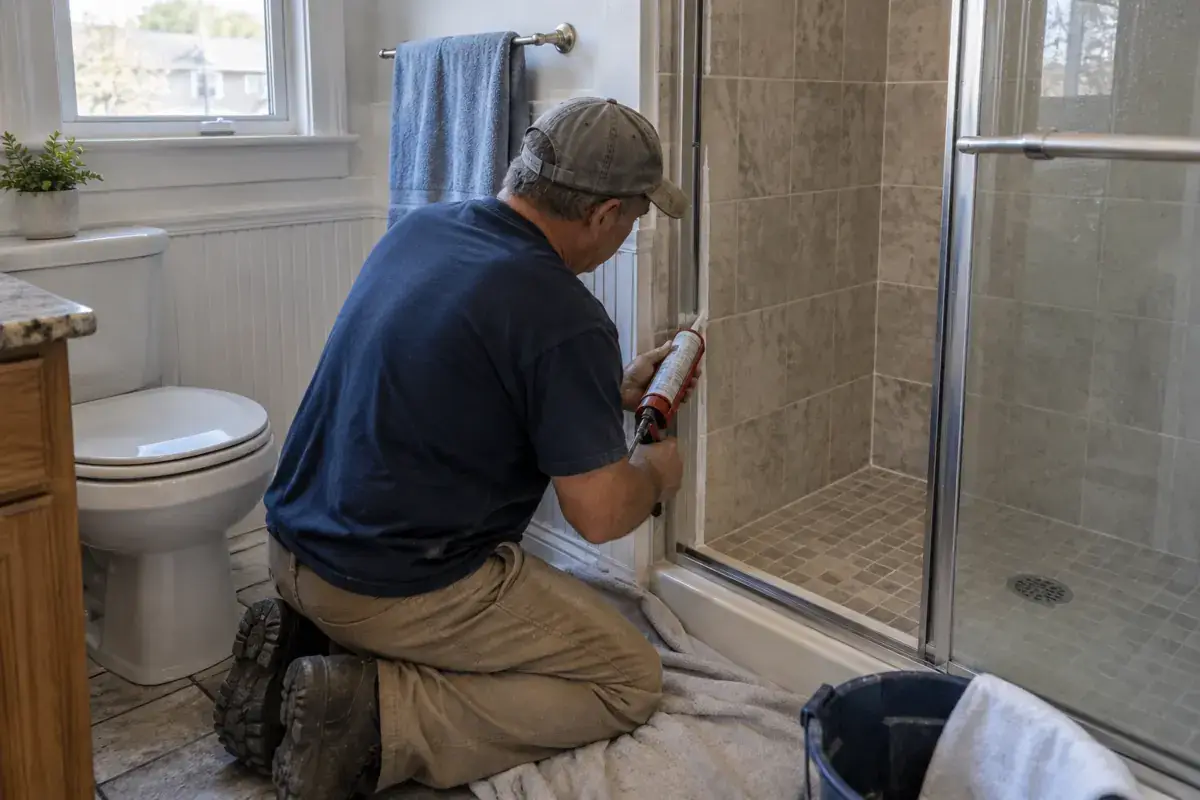
- Caulk joints at corners and the tub/tile seam: Flexible sealant accommodates movement but should be replaced when it cracks, separates, or loses adhesion.
- Shower pan edges and drain seals: A damaged or poorly detailed pan can allow water to reach the subfloor or framing instead of directing it to the drain.
- Niche and shelf corners: Built-in shelves create extra seams and inside corners that are easy to miss during caulking.
- Cracked or loose tiles: A single cracked tile can let water reach the membrane underneath even if the surrounding tile looks fine.
For deteriorated grout rather than a pan or membrane failure, see our guide to grout repair, cleaning, and sealing.
How to Waterproof Shower Tile the Right Way
Proper waterproofing happens in layers, starting before the tile ever goes on the wall. Common approaches include sheet membranes, waterproof foam-board systems, and liquid-applied membranes; use a complete, compatible system and follow its manufacturer’s instructions.
- Prepare the substrate. Walls and the shower base need a sound, stable substrate that is compatible with the selected waterproofing system.
- Apply the membrane. A sheet membrane, foam board, or liquid membrane is installed over the backerboard and at the pan-to-wall transition, which is the most leak-prone joint in the whole assembly.
- Flood-test the pan. As Fine Homebuilding describes, a flood test involves plugging the drain, filling the pan with water to the curb line, and letting it sit for at least 24 hours to confirm there is no drop in water level before tile goes down.
- Install tile over the cured membrane. Tile is set with thin-set mortar once the waterproofing layer has fully cured per the manufacturer’s instructions.
- Grout and seal. Cementitious grout should be sealed when its manufacturer calls for it, while changes of plane and other movement joints need a compatible flexible sealant installed according to the tile and waterproofing system requirements.
This is a job most homeowners can partially DIY for small touch-ups, but full membrane work behind existing tile usually means opening the wall, which is a bigger project than most people expect going in.
New Jersey Code Rules Worth Knowing
New Jersey has specific construction code requirements around shower waterproofing that matter if you are planning a full renovation rather than a repair. The New Jersey Department of Community Affairs maintains the current adopted construction codes, including the building subcode referencing national I-Codes and ICC standards.
One rule worth knowing: field-fabricated fiberglass shower pans are not permitted under New Jersey code. Only membranes listed under the National Standard Plumbing Code, such as those meeting ASTM D4068 or ASTM D4551, or lead liners, are allowed for shower pan construction. Any deviation requires a formal variation request reviewed by the local plumbing subcode official, and approval is not guaranteed.
This matters because it rules out certain shortcuts that might otherwise seem like a quick fix for a failing pan. If your project involves replacing or rebuilding a shower pan rather than resurfacing existing surfaces, consult the local code office and use appropriately qualified trades for the plumbing and waterproofing work rather than attempting a field-fabricated fiberglass pan.
Repair vs. Replace: When Can You Save the Existing Tile?
Not every leak means a full tile tear-out. The right fix depends on how far the water damage has traveled and whether the underlying structure is still sound.
| Situation | Likely Fix | When to Call a Pro |
|---|---|---|
| Cracked or missing grout, tile surface intact | Regrout and reseal affected lines | If staining or soft spots appear nearby |
| Caulk peeling or yellowing at seams | Remove and replace caulk joint | If caulk keeps failing within months |
| One or two cracked tiles, no soft wall behind them | Spot repair or tile replacement | If tile sounds hollow when tapped |
| Soft, spongy, or discolored wall near the shower | Open wall, inspect membrane and framing | Always — this signals active water intrusion |
| Persistent musty odor or visible mold at the base | Remove affected materials, treat, rebuild waterproofing | Promptly — mold can affect indoor conditions, and rot may weaken building materials |
A quality shower tiling project, when properly waterproofed from the start, is meant to last for many years with routine maintenance rather than repeated repairs. If you are weighing a full tile replacement against resurfacing an otherwise sound surface, it helps to understand the difference between cosmetic and structural fixes, which we cover in our tile reglazing in NJ overview.
What a Shower Tile Sealant Can and Can’t Fix
Sealants play a real but limited role in leak prevention. A penetrating grout sealant fills the pores in grout so it absorbs less water, which slows deterioration and reduces staining. Where the grout manufacturer recommends a penetrating sealer, reapply it at the interval stated on the product label and when performance indicates it is needed.
What sealant cannot do is fix a failed membrane, a cracked pan, or rotted framing behind the wall. If water has already gotten past the tile and grout and is sitting against the backerboard or studs, no amount of surface sealant will stop ongoing damage. At that point the fix has to happen at the membrane or structural level, not the surface.
This is also where fiberglass showers differ from tiled ones. Fiberglass units can develop their own moisture-related failures, most commonly peeling or delamination of the gel coat. If the damaged area is fiberglass rather than tile, review Jemco Reglazers’ bathroom refinishing services, which include fiberglass repair.
DIY Waterproofing Maintenance vs. Calling a Professional
Plenty of shower waterproofing maintenance is reasonable to do yourself, and plenty is not. Knowing the line protects both your bathroom and your budget.
- Safe to DIY: Resealing grout lines, replacing worn caulk at the tub-to-tile seam, cleaning with non-abrasive products, and spot-checking for soft spots near the shower floor.
- Call a professional: Any soft or discolored wall section, visible mold growth, a shower pan that fails a flood test, cracked tile over a suspected wet area, or any work involving the shower pan itself under New Jersey code.
- Cost context: This Old House estimates a full shower tile installation averages around $3,500, with a typical range of roughly $1,335 to $5,005 depending on materials, while Angi estimates wall water damage repair alone can run $3.75 to $10 per square foot before any new tile goes back up. These figures are general industry estimates, not quotes, and your actual cost depends on the extent of hidden damage, tile choice, and labor in your area.
Jemco Reglazers, a family-owned business based in Toms River with more than 15 years of hands-on experience, works on tile and surface repairs across Ocean County, Brick, Manchester Township, Howell, Lakewood, Jackson, Point Pleasant, and beyond. Jemco Reglazers offers honest, no-pressure service for resurfacing and repair work; structural waterproofing or plumbing failures may require another qualified trade before refinishing.
Protecting Your Investment After Repair or Resurfacing
Once a shower is repaired, resealed, or resurfaced, routine maintenance helps protect surface joints and makes developing problems easier to spot. Wipe down tile and grout after use when practical, run the bathroom fan or crack a window during and after showers, and recaulk flexible joints at the first sign of cracking rather than waiting for a gap to open up.
If your shower combines tile with a fiberglass pan or surround, be aware that the two materials age differently and sometimes need different attention. We cover that distinction in our page on bathtub resurfacing in New Jersey, which also touches on how resurfacing compares to full replacement for tubs and surrounds.
For homeowners weighing whether to repair isolated tile damage or move toward a fuller bathroom refresh, it is worth reviewing our full list of bathroom refinishing services and our gallery of completed reglazing work to see what a finished repair or resurfacing project actually looks like before committing either way.
Frequently Asked Questions
How often should shower tile grout be resealed?
Cementitious grout may require periodic resealing, while epoxy and some other grout types do not. Follow the grout and sealer manufacturers’ instructions, and inspect for darkening, absorption, cracking, or loss of adhesion rather than relying on a fixed calendar interval.
Can I tile directly over old shower tile?
It is possible in some cases if the existing tile and substrate are structurally sound and flat, but it adds weight and can trap existing moisture problems behind the new layer. A professional assessment is the safer route before covering up tile that may already have hidden water damage.
What does a soft spot on a shower wall mean?
A soft or spongy spot can indicate a loose finish, damaged substrate, or moisture intrusion behind the tile. This should be treated as an active leak and inspected promptly, since delaying can allow rot or mold to spread further into the wall.
Is caulk or grout better at the tub-to-tile seam?
Flexible caulk, not grout, belongs at the tub-to-tile seam and inside corners because these joints expand and contract slightly with the house. Grout is rigid and will crack in these spots, which is why professionals specifically reserve caulk for movement joints.
Does reglazing fix a leaking shower?
Reglazing restores the cosmetic surface of tile, tubs, or fiberglass, but it does not repair a failed waterproofing membrane or structural leak behind the wall. If a leak is active, the underlying moisture problem needs to be fixed first before any cosmetic resurfacing is applied.
Sources
- Measure Guideline: Water Management at Tub and Shower Assemblies (U.S. DOE Building America)
- Tile Shower Waterproofing Methods | Angi
- How Much Does It Cost To Tile A Shower? | Angi
- Three Ways to Waterproof Tile Showers – Fine Homebuilding
- Shower Tile Installation: Complete DIY Guide and Professional Tips – This Old House
- Field fabricated fiberglass shower pans are not allowed by code in the State of New Jersey
Written by the team at Jemco Reglazers, a family-owned New Jersey bathtub and tile reglazing company with over 15 years of hands-on experience restoring bathroom surfaces.